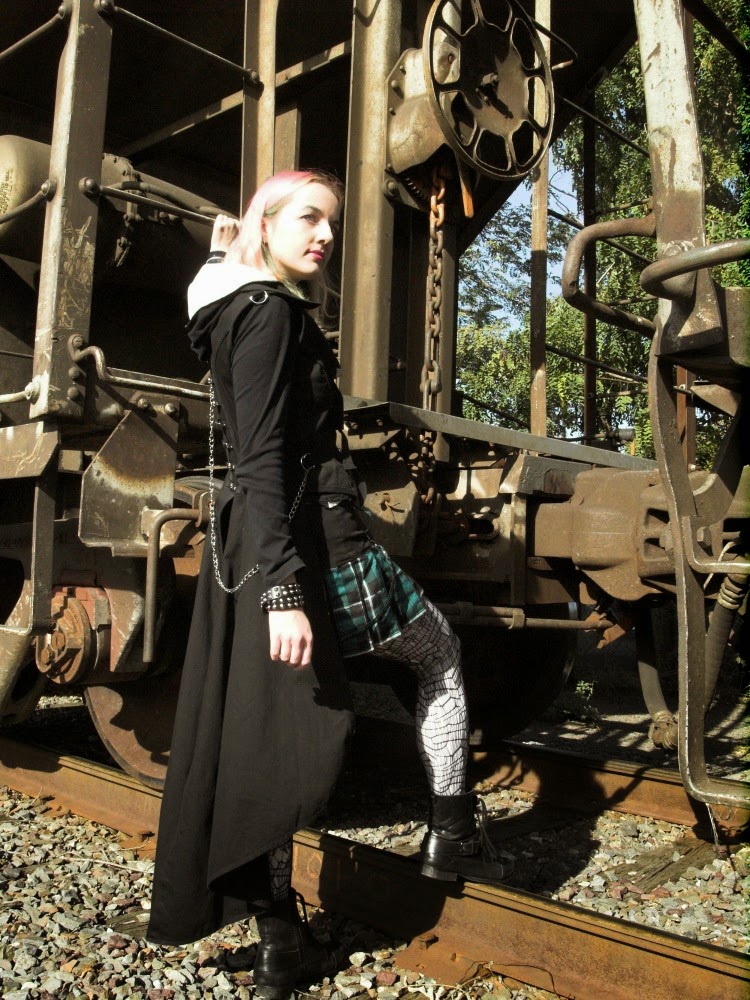
I posted about finishing the Galliano Pirate Jacket quite a while ago, and also about making this sweet vampire inspired vest. The photos I had of them back then aren't the best, so I thought I would do a little update.
Bria modeled the jacket for me so I could take a couple better photos.
She also took some photos of me last month, and I wore my long vest:
Adventures in sewing pretty much anything. Find me on Etsy and Facebook as well: Ambrodust Clothing
Showing posts with label Galliano jacket. Show all posts
Thursday, November 13, 2014
Wednesday, February 12, 2014
I probably did nothing properly but here it is! The jacket is done!
First of all, here are all the progress posts and a link to the original pattern for the Galliano Pirate Jacket. I pretty much abandoned any instructions and a lot of pattern pieces while making this, mostly because if I tried to take it too seriously I knew I would have never finished. Winging it has resulted in a finished jacket with a ton of imperfections, but hopefully no one will notice because they'll be too confused by the whole thing anyways.
As you can see, I went with straps and D-rings for closures. Like I considered in my last post, I also took apart the square end on the bottom, recut it, and added binding to make it match the rest of the jacket.
Here you can see the bottom of the back fits me pretty well, unlike when it sticks out on my dressform.
The original jacket suggests two ways of closing it (with snaps in two different orientations). I wasn't really paying attention to this part when making it, but stumbled upon it while taking the photos, so here are the two ways mine closes - either matching up both side straps (all above photos) or attaching the bottom strap to the top set of D-rings and letting the extra straps hang (two photos below).
It fits my dressform a lot differently than my body, but it's easier to see where the straps all go, so here's that:
Finally, for my/your amusement, here's what it looks like flat... some sort of strange unrecognizable creature.
As you can see, I went with straps and D-rings for closures. Like I considered in my last post, I also took apart the square end on the bottom, recut it, and added binding to make it match the rest of the jacket.
Here you can see the bottom of the back fits me pretty well, unlike when it sticks out on my dressform.
The original jacket suggests two ways of closing it (with snaps in two different orientations). I wasn't really paying attention to this part when making it, but stumbled upon it while taking the photos, so here are the two ways mine closes - either matching up both side straps (all above photos) or attaching the bottom strap to the top set of D-rings and letting the extra straps hang (two photos below).
It fits my dressform a lot differently than my body, but it's easier to see where the straps all go, so here's that:
Finally, for my/your amusement, here's what it looks like flat... some sort of strange unrecognizable creature.
Wednesday, February 5, 2014
Hey! Another Galliano pirate jacket update already!
Here are the previous posts about this project if you're just seeing it for the first time:
Pattern cutting
First update
... and here's what I have done. It's looking pretty close to actual clothing at this point!
(I tend to sew at night and snapped these photos quickly, so please excuse the quality)
As you can see, the biggest difference from last time is that I added twill tape binding along most of the edges. This bottom square edge... I don't know... I wanted to skip the binding so it echos the neck/shoulder edge, but it's doing a silly wiggling thing that I'm not pleased with. I think I will rip out the top-stitching on it, re-cut slightly, and bind it instead. Speaking of the binding, I realized while cleaning up some chalk marks that it's probably not color fast. Well damn. Guess I'm never washing this.
I've added a shoulder strap out of twill tape instead of the gathered strap that came with the pattern and elastic in the neckline edge that was gaping last time. I might still make the original strap and have it attach onto the twill tape. I thought adding the elastic might cause some weird pulling but it actually worked out pretty well.
You can kind of see the tab in the neckline with a strap angling downward. I really wanted this strap to go across my chest under the arm but angled it too much. I don't have the patience to re-do it, especially considering this white striped fabric is just shredding on the edges and there was already barely enough seam allowance there. I'll have to think of something to do with that strap.
I'm a little stuck on a closure for this thing. The original pattern uses snaps, but I am definitely not setting that many snaps by hand or getting a snap setter anytime soon, so that's out. I do have a large supply of D-rings and there's already twill tape straps on this thing, so I'm leaning towards that. The problem is where do I put them? The jacket doesn't fit on my body the same as a dress form, and holding it on while trying to figure out and mark where the straps/rings should go is not fun. I'll probably have to do it though, unless I come up with a better solution.
Pattern cutting
First update
... and here's what I have done. It's looking pretty close to actual clothing at this point!
(I tend to sew at night and snapped these photos quickly, so please excuse the quality)
As you can see, the biggest difference from last time is that I added twill tape binding along most of the edges. This bottom square edge... I don't know... I wanted to skip the binding so it echos the neck/shoulder edge, but it's doing a silly wiggling thing that I'm not pleased with. I think I will rip out the top-stitching on it, re-cut slightly, and bind it instead. Speaking of the binding, I realized while cleaning up some chalk marks that it's probably not color fast. Well damn. Guess I'm never washing this.
I've added a shoulder strap out of twill tape instead of the gathered strap that came with the pattern and elastic in the neckline edge that was gaping last time. I might still make the original strap and have it attach onto the twill tape. I thought adding the elastic might cause some weird pulling but it actually worked out pretty well.
You can kind of see the tab in the neckline with a strap angling downward. I really wanted this strap to go across my chest under the arm but angled it too much. I don't have the patience to re-do it, especially considering this white striped fabric is just shredding on the edges and there was already barely enough seam allowance there. I'll have to think of something to do with that strap.
I'm a little stuck on a closure for this thing. The original pattern uses snaps, but I am definitely not setting that many snaps by hand or getting a snap setter anytime soon, so that's out. I do have a large supply of D-rings and there's already twill tape straps on this thing, so I'm leaning towards that. The problem is where do I put them? The jacket doesn't fit on my body the same as a dress form, and holding it on while trying to figure out and mark where the straps/rings should go is not fun. I'll probably have to do it though, unless I come up with a better solution.
Tuesday, January 28, 2014
Wait, I actually worked on the Galliano jacket? Really?
Yea, I'm not sure what came over me here. Last night I was looking for some project, something I wouldn't have to think too much about because I wasn't feeling too well, and somehow I ended up working on the Galliano pirate jacket (pattern available here).
In case you're not familiar with this pattern, it's super crazy and has way too many pieces, and no instructions (not that I often follow instructions). I think I would have been less likely to work on it had it included instructions actually, mainly because at this point I'm not doing anything properly and just winging it. It's not going to really be the Galliano pirate jacket at the end, but hopefully it'll be some free-form wearable thing that I put a bunch of strange effort into.
My first post about this project is here. It's pretty much a quick blurb about cutting out the pattern. I did start the jacket back during the summer (May or June, something like that), and I thought I had posted about it but apparently not. Here's a photo from then for reference:
In case you're not familiar with this pattern, it's super crazy and has way too many pieces, and no instructions (not that I often follow instructions). I think I would have been less likely to work on it had it included instructions actually, mainly because at this point I'm not doing anything properly and just winging it. It's not going to really be the Galliano pirate jacket at the end, but hopefully it'll be some free-form wearable thing that I put a bunch of strange effort into.
My first post about this project is here. It's pretty much a quick blurb about cutting out the pattern. I did start the jacket back during the summer (May or June, something like that), and I thought I had posted about it but apparently not. Here's a photo from then for reference:
I'm using a solid red and a fine red/white stripe. The solid has stretch, which is not helpful at all in this case, and the stripe likes to shred where cut... also a fun time!
Back to the present: I pretty much stopped paying attention to how this jacket is supposed to work and am just making it work. Last night I cut out and pieced together a lining using white denim (yay no interfacing) and some of the red (yay interfacing). I've also attached the lining strategically and left other edges open (pinned in the photos). These will be bound with black twill tape. There will also be lots of twill tape straps and corresponding hardware probably... hopefully... someday...
Above is the lining side. Below you can see what it now looks like from the outside.
The most annoying part of this is the gaping at the upper back. This doesn't really go away no matter how I fiddle with the pieces. I'm thinking I'll add some elastic on that edge (to match the as-of-now non-existent gathered shoulder strap) but I don't know if that will look silly. Then again, this already looks ridiculous enough that it might not matter. Looking at the photos it's also gaping at the lower back, but I don't recall that being a big problem when I try the jacket on myself, so maybe it's just a dress-form issue.
Well there it is, relatively together! It'll probably sit around in a pile for a couple months again until a sudden bout of "what am I going to do tonight," but we'll see.
Monday, April 23, 2012
The hat of pain and pattern of many pieces
In my last post, I wrote about purchasing this hat pattern from Truly Victorian and some millinery supplies. Well, the pattern came on Saturday and the supplies a day before, so I got to work on my hat all day Saturday. I probably could have finished it in a day, but got stuck because I don't have enough trim for the edge of the brim. (Why do I never have trim?)
The pattern is great though (it's not the pattern of many pieces, that one will be discussed later). I've been doing it a little differently than instructed, mostly because of the qualities of my fabric - not because I can't understand the instructions or think they make things more difficult than necessary, which can happen with commercial patterns. This fabric is not the easiest to work with, don't let its simple black appearance fool you. It's pretty drapey, so the edges of the frame were very obvious when I tried covering it. To remedy this, I added a layer of fleece over the buckram frame.
"So," you may be wondering, "how is this the hat of pain?"
The pattern is great though (it's not the pattern of many pieces, that one will be discussed later). I've been doing it a little differently than instructed, mostly because of the qualities of my fabric - not because I can't understand the instructions or think they make things more difficult than necessary, which can happen with commercial patterns. This fabric is not the easiest to work with, don't let its simple black appearance fool you. It's pretty drapey, so the edges of the frame were very obvious when I tried covering it. To remedy this, I added a layer of fleece over the buckram frame.
"So," you may be wondering, "how is this the hat of pain?"
Subscribe to:
Posts (Atom)